


Finally our Google Home supports Philips Hue scenes natively! Still, if this feature does not work for you, here’s a workaround.
Before we start, let me warn you that with this workaround you will need to configure every scene manually. It is a terrible workaround, but if you are new to IFTTT, you might find it enlightening to see how it works and how it connects bits and pieces.
Please make sure you’ve set up Google Home and Philips Hue according to the original post here: Google Assistant and Philips Hue: Setup, Review and Voice Commands.
In this post we will set up IFTTT to connect our Google Assistant with our Philips Hue lights and have our Philips Hue Scenes available in Google Assistant.
What is IFTTT?

Launched in 2011, IFTTT, which is short for If This Then That, provides a free web-service for connecting different services with simple conditions. Back in 2014, when I first started to play around with IFTTT, I tried to connect some WeMo motion sensors with Philips Hue, only to realize, oops, it can take up to 15 minutes that one service gets notified by another through IFTTT. That was a no-go for smart lighting back then, but the time has changed. Some services have improved over time and people like to use it and – why not – if it provides (temporary) workarounds, let’s check them out.
IFTTT Concepts
Services are the different web-services that we can connect together, in form of an action. The Google Assistant and Philips Hue services, is what we need in our case. The trigger would be certain phrases recognized by Google Assistant, e.g. “set the scene …” and the action would be to set the corresponding scene through the Philips Hue service.
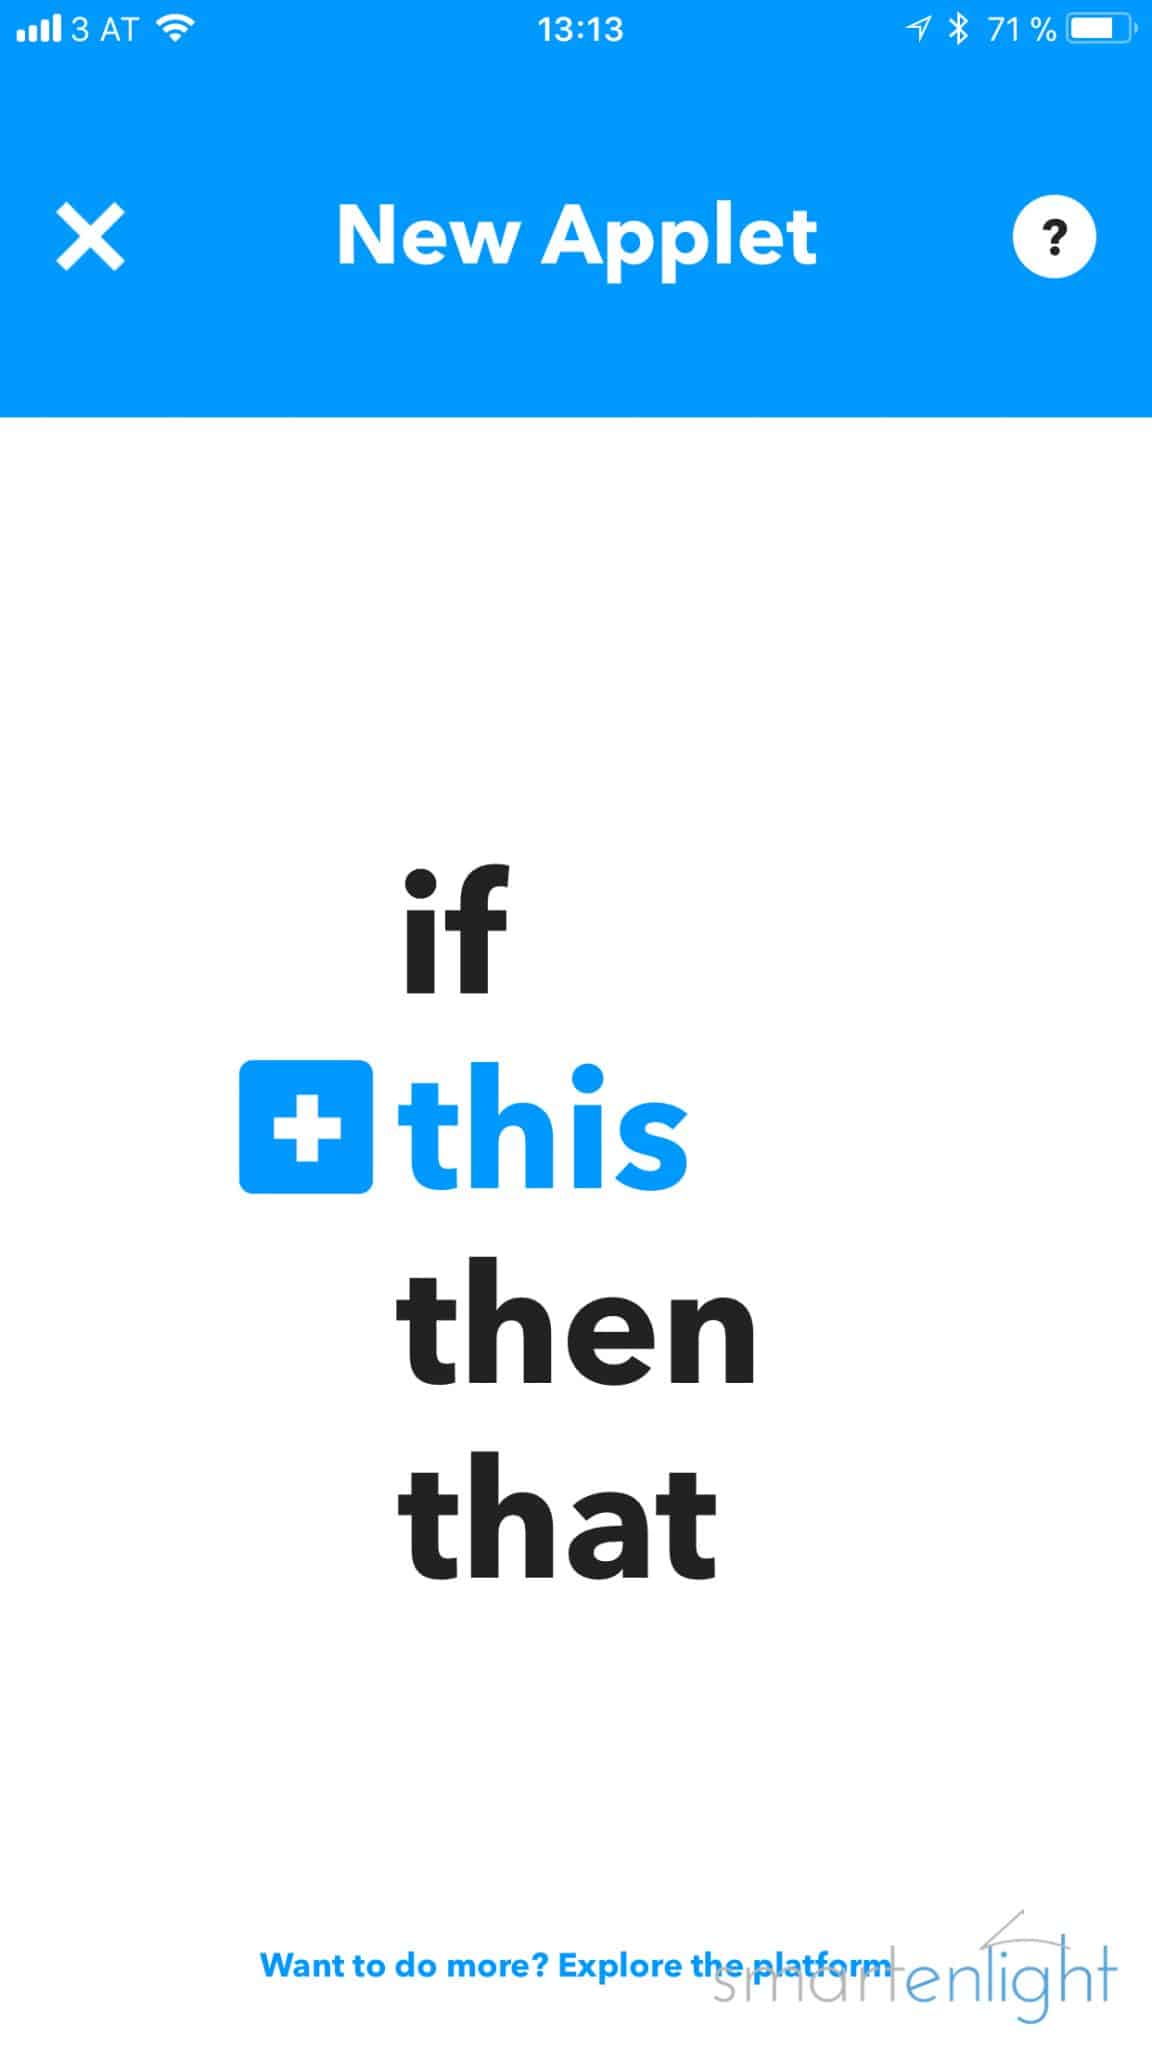
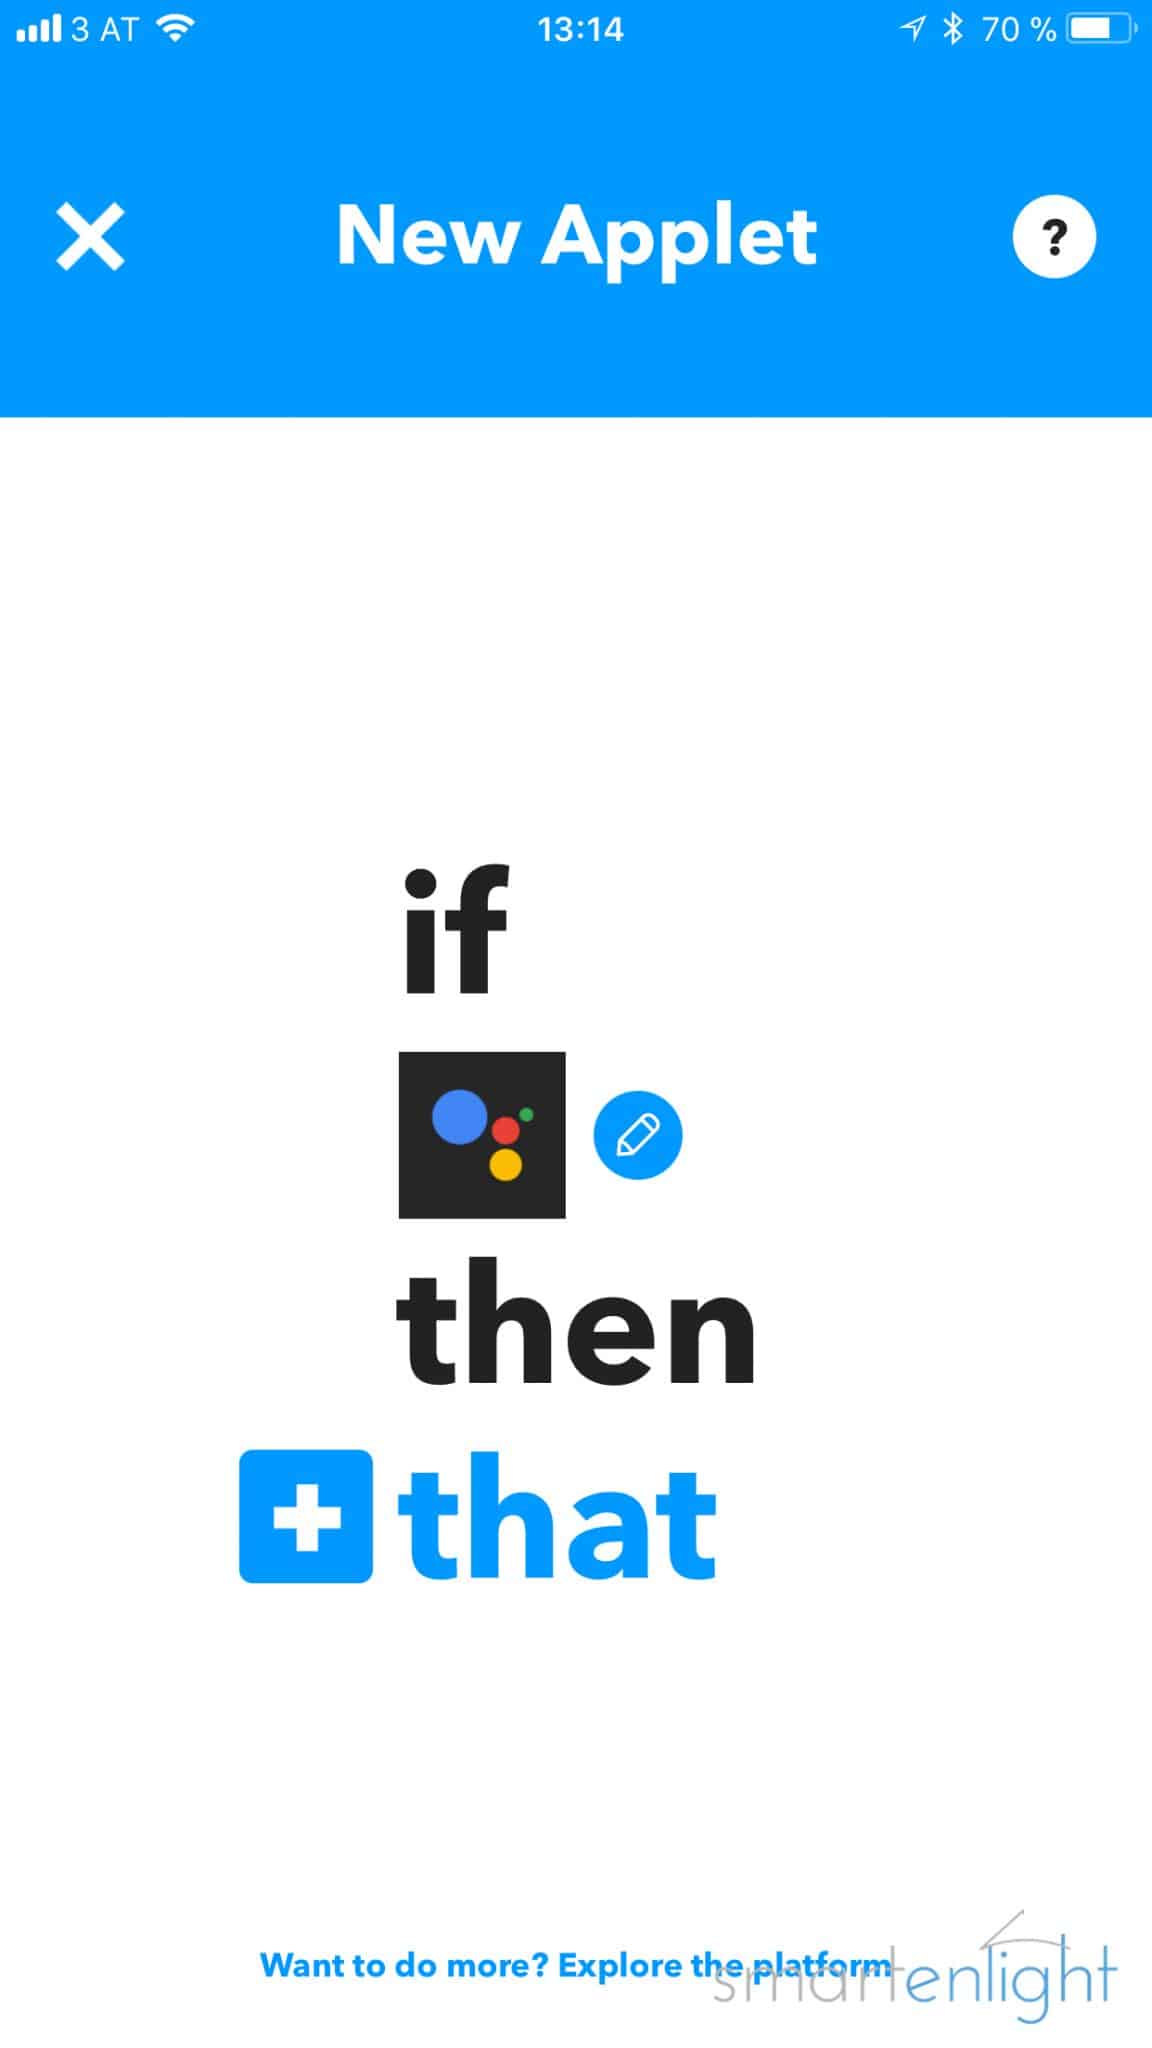
The applet we need to create looks like:
If this (Trigger: Google Assistant recognizes e.g. “set the scene couch relax”)
then that (Action: e.g. “set the scene couch relax” through the Philips Hue service).
Setting Up the Philips IFTTT Applet
Head over to the official web-site of IFTTT and either download the iOS or the Android app, if you prefer to configure it on your smartphone/tablet or register on the website, if you want to use your desktop browser.

Once you have created your IFTTT account, on your preferred platform, navigate to this IFTTT applet link provided by Philips: Tell Google Assistant to set the scene and click “turn on”.
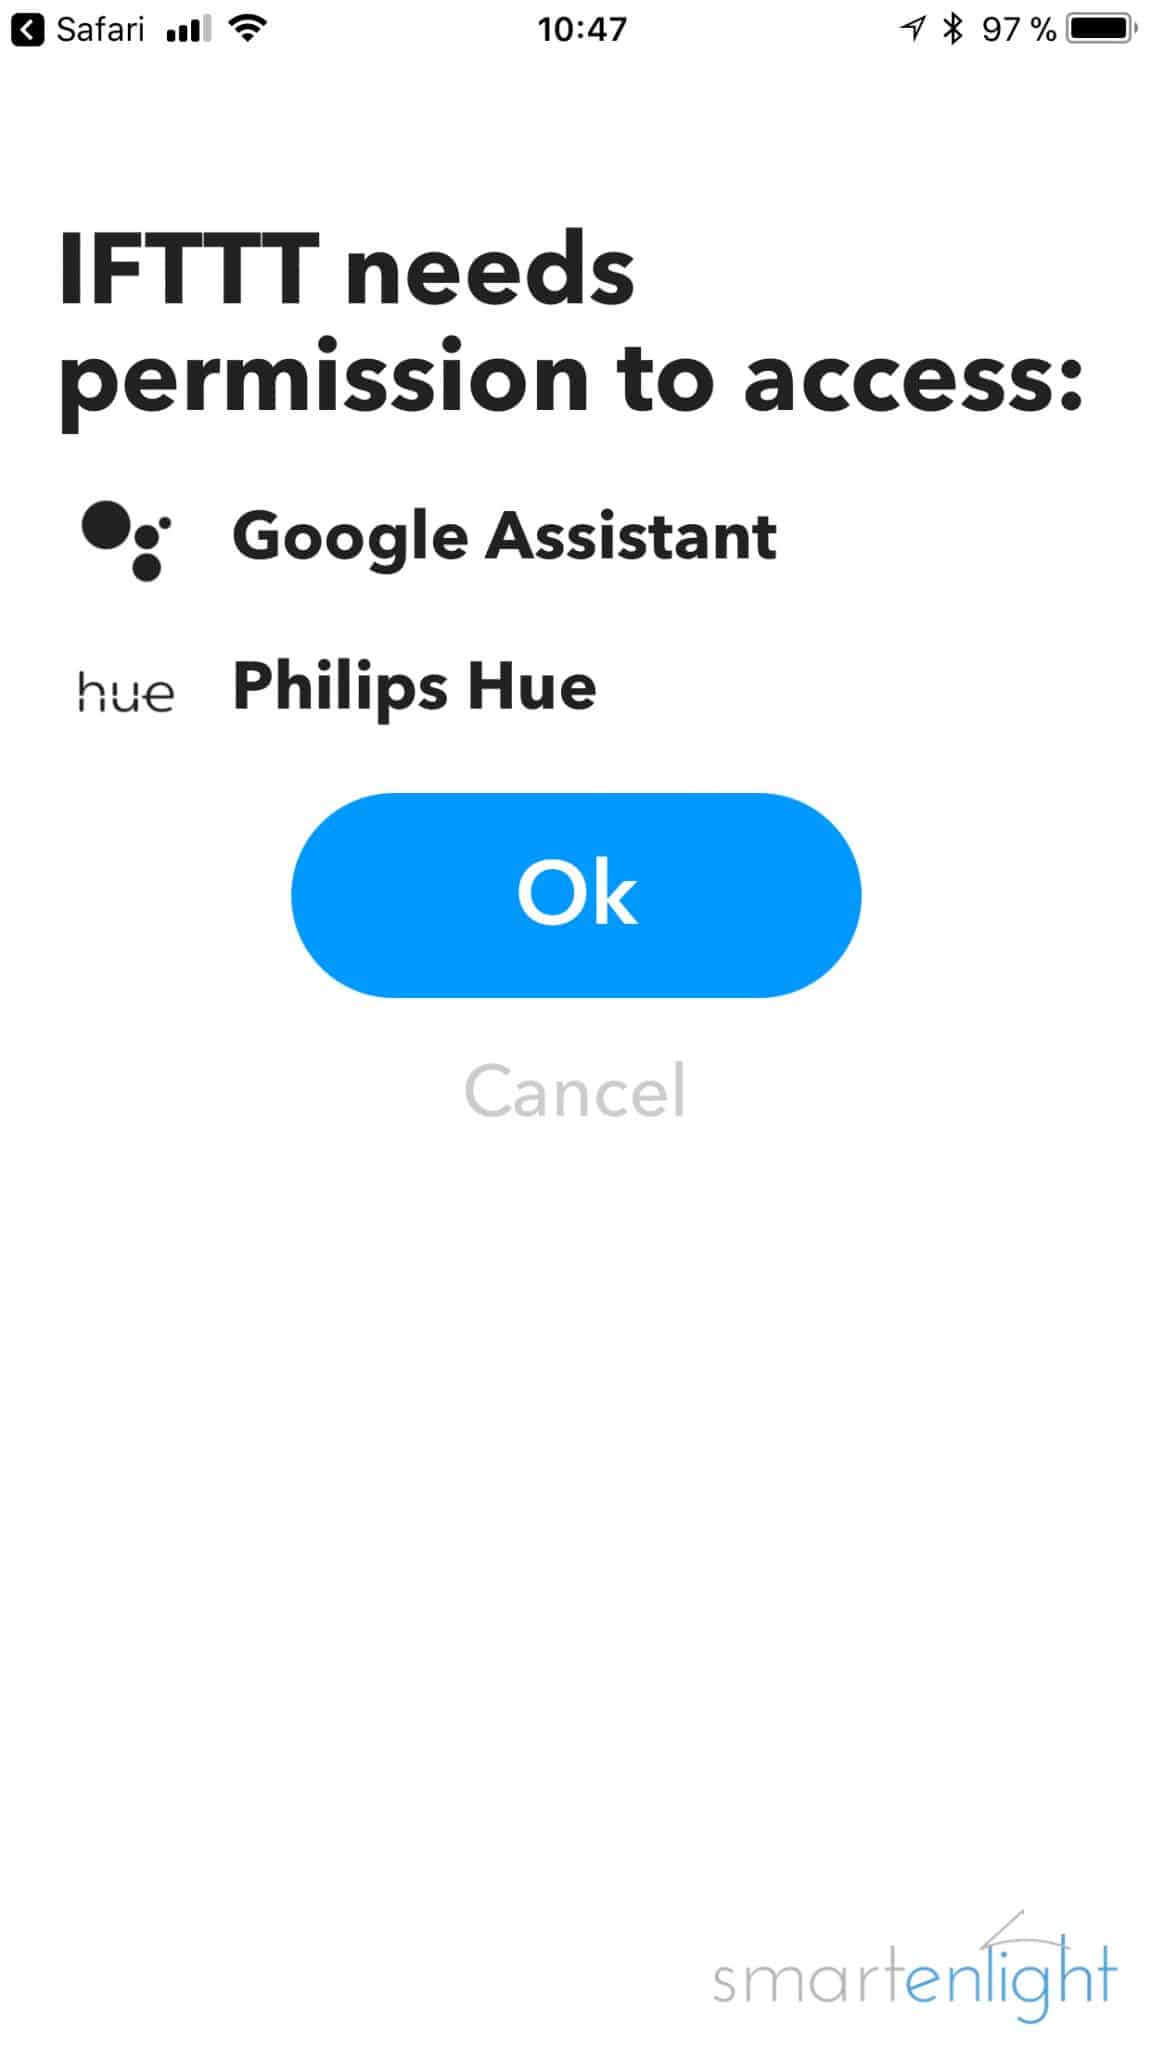
Depending on whether you’ve already connected any of these services, IFTTT will indicate that it needs the Google Assistant and Philips Hue service for this applet, acknowledge by tapping “OK”.
Enter your Google Assistant account. You will see a notification that IFTTT wants to manage your Google voice commands, you need to click “allow”. The next screen is connecting IFTTT to your Philips Hue account. In case you have multiple Hue bridges, log in with the Philips Hue account which contains the scenes you want to control.
Configuring the Philips IFTTT Applet
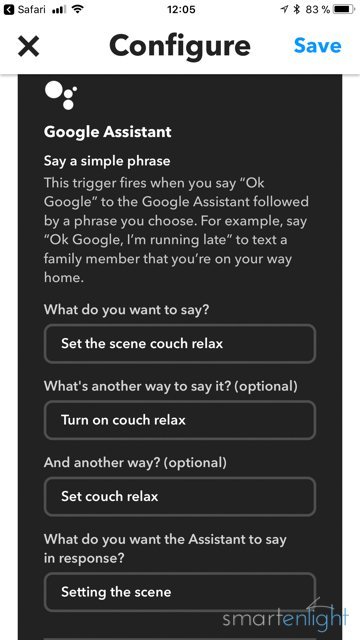
Now we are in the applet configuration and here we can set up, up to three phrases which Google Assistant will recognize. We can specify a response phrase, e.g. “Setting the scene …” which Google Assistant will utter as soon as it activates the action and we can select which Philips Hue scene shall be activated.
Note, that the 2 dashes, e.g. “–Couch” represent a room and the respective scenes are below that. Pick – for instance – the scene “Relax” under the room “–Couch”. Save the applet and a message “Success – Applet turned on” will indicate that we are ready to test. Utter one of the three phrases, which Google Assistant will acknowledge by saying “Setting the scene …” and Philips Hue will set the specified scene triggered by IFTTT.
Mission accomplished.
Yes, but that’s only ONE scene?
Bummer, if we need more scenes supported, we need to create more applets. Back in the old IFTTT days when applets were called recipes, we were able to duplicate them. Today we need to create an applet from scratch, for every scene, in every room. Don’t tell me I have not warned you.
The “If This”
Under the tab “My Applets” click the big plus sign in the top right corner. Click on the blue “+this” to add the first service, which is Google Assistant.
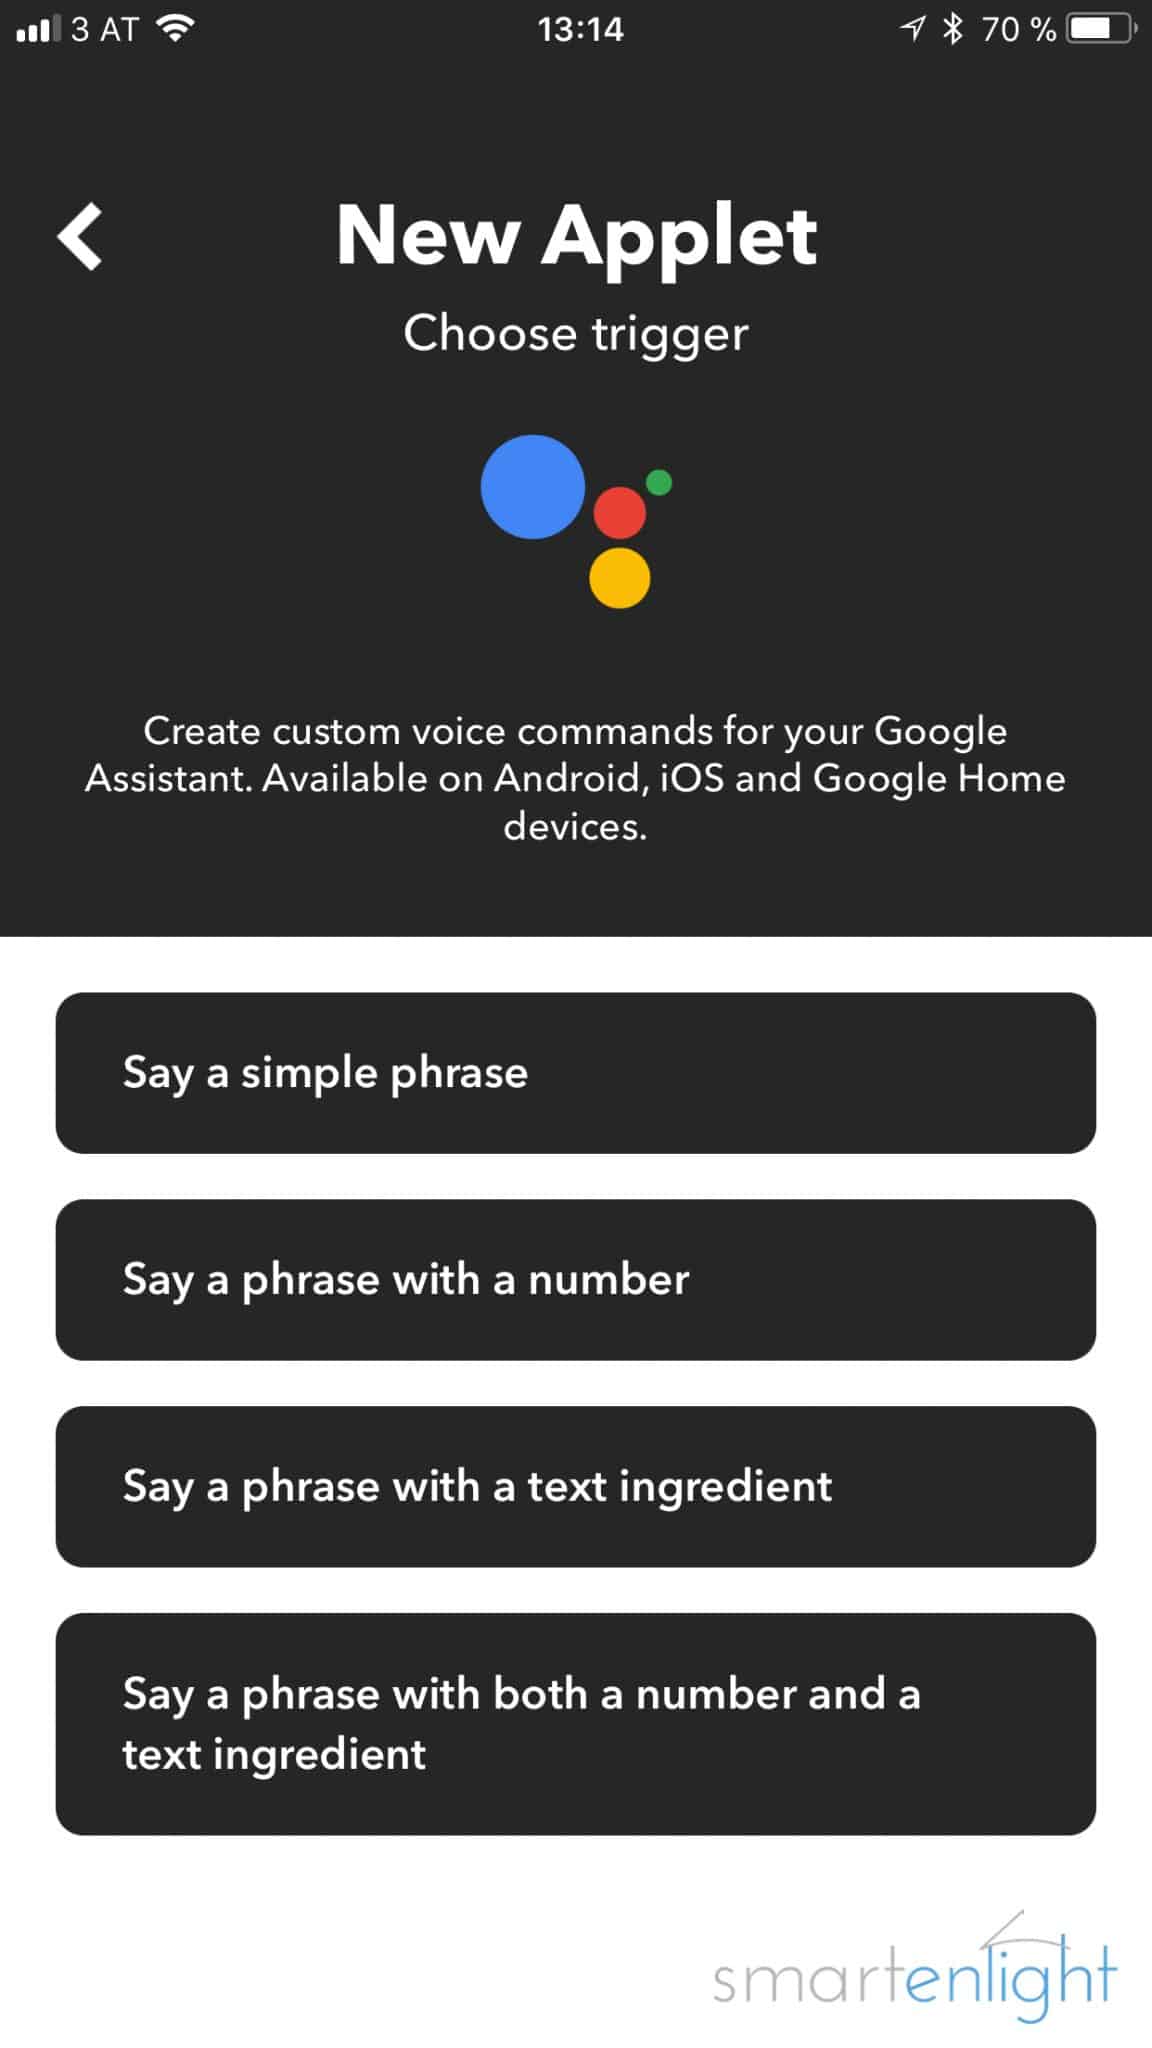
Now we see the different triggers Google Assistant provides, we pick the first one: “Say a simple phrase”.
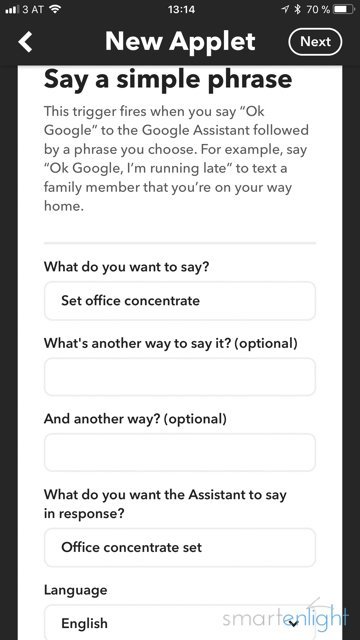
A familiar dialog pops up where we can define up to three phrases and the Assistants response.
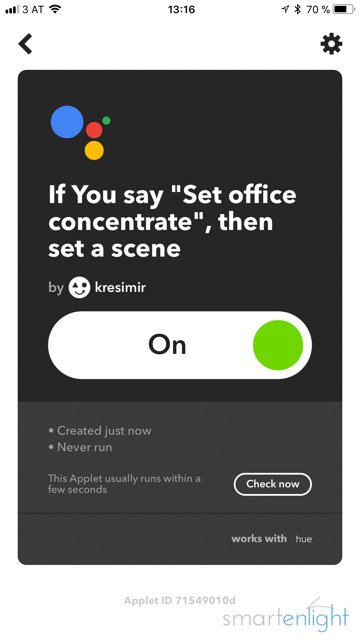
Let’s fill them with another example, like “Set office concentrate”. Click “next”.
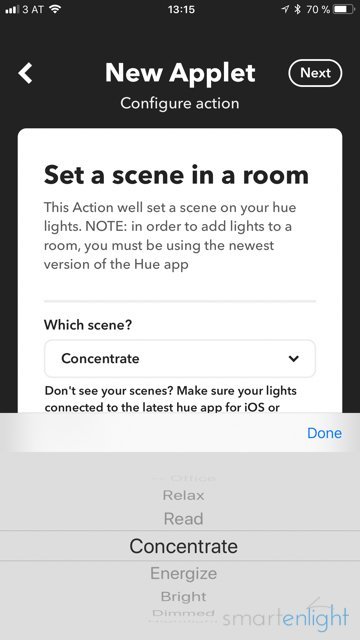
The “Then That”
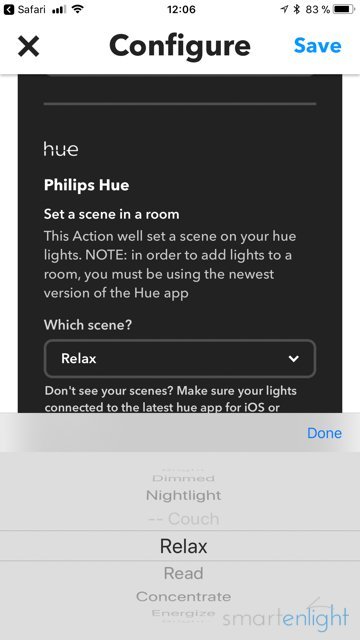
We now need to specify the “+that” service, which is Philips Hue. The following list shows us all the actions we can perform through IFTTT on our Philips Hue lights.
We pick “set a scene in a room” and specify “concentrate” under the room “–Office”. After finishing our configuration, we are ready with this scene.
Repeat the process above for every scene you would like to speech-enable with Google Home.
Conclusion
So this was the “official” workaround by Philips to support scenes in the Google Assistant. I believe we all agree, that it’s rather tedious to workaround this way.
Google has implemented many improvements in 2018. Thankfully, we don’t need to workaround anymore!
- Natural Light with Smart Lighting
- The Many Ways of Controlling Smart Lighting
- Presence controlled Smart Lighting
- Sleeping Better with Smart Lighting
If you have any questions or want to share your experience, thoughts and ideas in regard to IFTTT, Google Assistant and Philips Hue, please leave your comment below!


